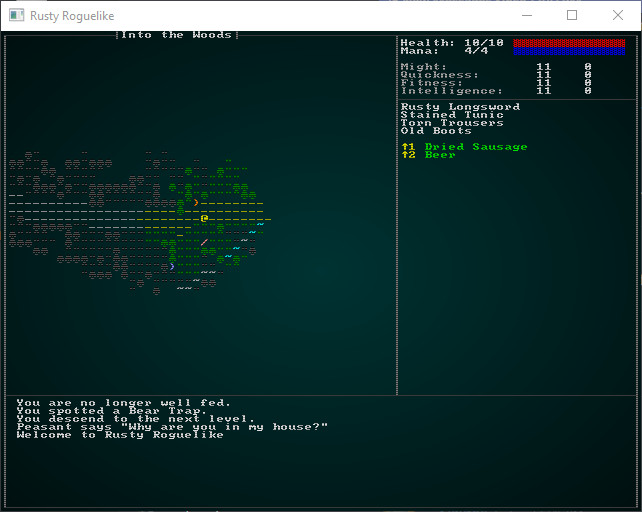
走进森林!
关于本教程
本教程是免费且开源的,所有代码均使用 MIT 许可证 - 因此您可以随意使用它。 我希望您会喜欢本教程,并制作出很棒的游戏!
如果您喜欢这个教程并希望我继续写作,请考虑支持我的 Patreon。

我们用了一些章节来改进基础游戏、它的界面和起始城镇。这很有趣,而且老实说,我们可以持续改进很多章节 - 但在开发过程中看到一些真正的进展是个好主意。 否则,你往往会失去动力! 因此,在本章中,我们将为游戏添加下一个关卡,填充它,并探讨主题的概念来区分关卡。
走进森林!
我们的设计文档表明,我们将从城镇前往石灰岩洞穴。 这是一个好的开始,但从一个地方到另一个地方之间没有任何过渡是很不可能的; 否则,所有人都会去那里! 所以我们将在 Bracketon 镇旁边添加一片森林,其中有一个通往主要冒险的洞穴入口。 一条道路穿过森林,这是其他人通常去的地方(那些不打算拯救世界的人,而这才是大多数人!)。
让我们首先移动 Bracketon 的出口,使其覆盖整个东侧。 在 town.rs 中,找到放置出口的行(大约在第 36 行),并替换为:
#![allow(unused)]
fn main() {
for y in wall_gap_y-3 .. wall_gap_y + 4 {
    let exit_idx = build_data.map.xy_idx(build_data.width-2, y);
    build_data.map.tiles[exit_idx] = TileType::DownStairs;
}
}
这将用出口瓷砖填充通往城镇外的整条道路:
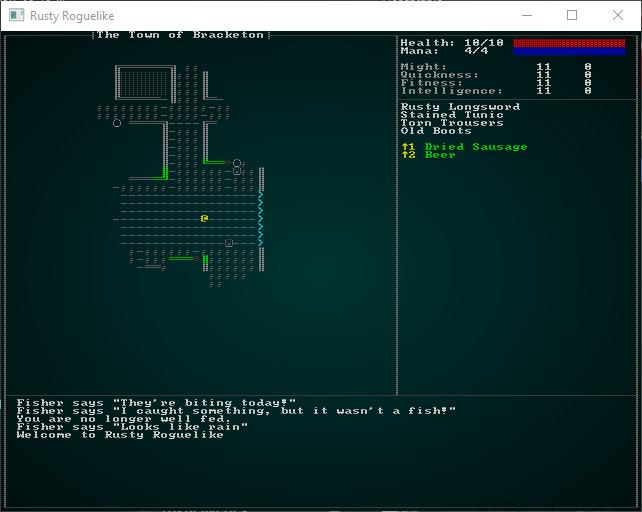
这有一个主要优点:它真的很难被错过!
构建森林
现在我们想开始第二个关卡。 在 map_builders/mod.rs 中,我们有函数 level_builder; 让我们在其中为第二个关卡添加一个新的调用:
#![allow(unused)]
fn main() {
pub fn level_builder(new_depth: i32, rng: &mut rltk::RandomNumberGenerator, width: i32, height: i32) -> BuilderChain {
    rltk::console::log(format!("Depth: {}", new_depth));
    match new_depth {
        1 => town_builder(new_depth, rng, width, height),
        2 => forest_builder(new_depth, rng, width, height),
        _ => random_builder(new_depth, rng, width, height)
    }
}
}
为了实现这一点,我们将创建一个新文件 - map_builders/forest.rs 并给它一些占位符内容(就像我们为城镇所做的那样):
#![allow(unused)]
fn main() {
use super::{BuilderChain, CellularAutomataBuilder, XStart, YStart, AreaStartingPosition,
    CullUnreachable, VoronoiSpawning, DistantExit};

pub fn forest_builder(new_depth: i32, _rng: &mut rltk::RandomNumberGenerator, width: i32, height: i32) -> BuilderChain {
    let mut chain = BuilderChain::new(new_depth, width, height, "Into the Woods");
    chain.start_with(CellularAutomataBuilder::new());
    chain.with(AreaStartingPosition::new(XStart::CENTER, YStart::CENTER));
    chain.with(CullUnreachable::new());
    chain.with(AreaStartingPosition::new(XStart::LEFT, YStart::CENTER));

    // Setup an exit and spawn mobs
    // 设置一个出口并生成怪物
    chain.with(VoronoiSpawning::new());
    chain.with(DistantExit::new());
    chain
}
}
另外,不要忘记将 mod forest; use forest::forest_builder 添加到你的 map_builders/mod.rs 文件中! 如果你运行这个,你会看到我们有一个基本的细胞自动机地牢:
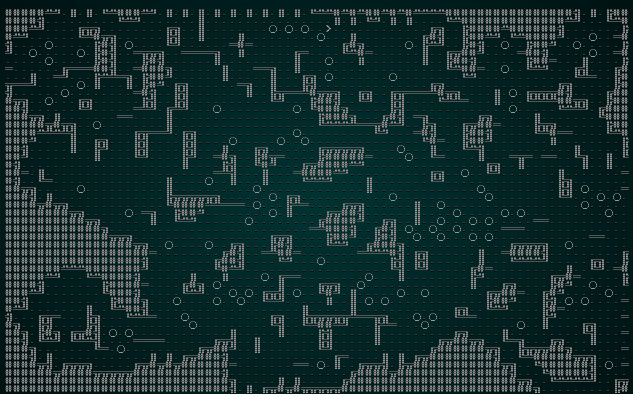
这真的不是我们想要的……还是说是呢? 它在形状上确实有点像森林 - 但到处都用墙壁图形渲染它并不能给人你身处森林的印象。
主题
你可以制作所有新的瓷砖,并让森林生成器吐出它们 - 但这会复制大量代码,仅仅是为了改变外观。 更好的方法是支持主题。 因此,城镇使用一种外观,森林使用另一种外观 - 但它们共享基本功能,例如墙壁阻挡移动。 现在我们揭示了为什么我们将 map 变成多文件模块:我们将构建一个主题引擎! 创建一个新文件,map/themes.rs,我们将放入一个默认函数和我们现有的瓷砖选择代码(来自 camera.rs):
#![allow(unused)]
fn main() {
use super::{Map, TileType};
use rltk::RGB;

pub fn tile_glyph(idx: usize, map : &Map) -> (rltk::FontCharType, RGB, RGB) {
    let (glyph, mut fg, mut bg) = match map.depth {
        2 => get_forest_glyph(idx, map),
        _ => get_tile_glyph_default(idx, map)
    };

    if map.bloodstains.contains(&idx) { bg = RGB::from_f32(0.75, 0., 0.); }
    if !map.visible_tiles[idx] {
        fg = fg.to_greyscale();
        bg = RGB::from_f32(0., 0., 0.); // Don't show stains out of visual range
                                         // 不显示视觉范围外的污渍
    }

    (glyph, fg, bg)
}

fn get_tile_glyph_default(idx: usize, map : &Map) -> (rltk::FontCharType, RGB, RGB) {
    let glyph;
    let fg;
    let bg = RGB::from_f32(0., 0., 0.);

    match map.tiles[idx] {
        TileType::Floor => { glyph = rltk::to_cp437('.'); fg = RGB::from_f32(0.0, 0.5, 0.5); }
        TileType::WoodFloor => { glyph = rltk::to_cp437('░'); fg = RGB::named(rltk::CHOCOLATE); }
        TileType::Wall => {
            let x = idx as i32 % map.width;
            let y = idx as i32 / map.width;
            glyph = wall_glyph(&*map, x, y);
            fg = RGB::from_f32(0., 1.0, 0.);
        }
        TileType::DownStairs => { glyph = rltk::to_cp437('>'); fg = RGB::from_f32(0., 1.0, 1.0); }
        TileType::Bridge => { glyph = rltk::to_cp437('.'); fg = RGB::named(rltk::CHOCOLATE); }
        TileType::Road => { glyph = rltk::to_cp437('≡'); fg = RGB::named(rltk::GRAY); }
        TileType::Grass => { glyph = rltk::to_cp437('"'); fg = RGB::named(rltk::GREEN); }
        TileType::ShallowWater => { glyph = rltk::to_cp437('~'); fg = RGB::named(rltk::CYAN); }
        TileType::DeepWater => { glyph = rltk::to_cp437('~'); fg = RGB::named(rltk::BLUE); }
        TileType::Gravel => { glyph = rltk::to_cp437(';'); fg = RGB::from_f32(0.5, 0.5, 0.5); }
    }

    (glyph, fg, bg)
}

fn wall_glyph(map : &Map, x: i32, y:i32) -> rltk::FontCharType {
    if x < 1 || x > map.width-2 || y < 1 || y > map.height-2 as i32 { return 35; }
    let mut mask : u8 = 0;

    if is_revealed_and_wall(map, x, y - 1) { mask +=1; }
    if is_revealed_and_wall(map, x, y + 1) { mask +=2; }
    if is_revealed_and_wall(map, x - 1, y) { mask +=4; }
    if is_revealed_and_wall(map, x + 1, y) { mask +=8; }

    match mask {
        0 => { 9 } // Pillar because we can't see neighbors
                   // 因为我们看不到邻居,所以是柱子
        1 => { 186 } // Wall only to the north
                     // 仅北侧有墙
        2 => { 186 } // Wall only to the south
                     // 仅南侧有墙
        3 => { 186 } // Wall to the north and south
                     // 南北两侧都有墙
        4 => { 205 } // Wall only to the west
                     // 仅西侧有墙
        5 => { 188 } // Wall to the north and west
                     // 西北两侧都有墙
        6 => { 187 } // Wall to the south and west
                     // 西南两侧都有墙
        7 => { 185 } // Wall to the north, south and west
                     // 西北南三侧都有墙
        8 => { 205 } // Wall only to the east
                     // 仅东侧有墙
        9 => { 200 } // Wall to the north and east
                     // 东北两侧都有墙
        10 => { 201 } // Wall to the south and east
                      // 东南两侧都有墙
        11 => { 204 } // Wall to the north, south and east
                      // 东北南三侧都有墙
        12 => { 205 } // Wall to the east and west
                      // 东西两侧都有墙
        13 => { 202 } // Wall to the east, west, and south
                      // 东西南三侧都有墙
        14 => { 203 } // Wall to the east, west, and north
                      // 东西北三侧都有墙
        15 => { 206 }  // ╬ Wall on all sides
                      // ╬ 四面都有墙
        _ => { 35 } // We missed one?
                    // 我们遗漏了一个?
    }
}

fn is_revealed_and_wall(map: &Map, x: i32, y: i32) -> bool {
    let idx = map.xy_idx(x, y);
    map.tiles[idx] == TileType::Wall && map.revealed_tiles[idx]
}
}
在 map/mod.rs 中添加 mod themes; pub use themes::* 以将其添加到你的项目中。
现在我们将修改 camera.rs,删除这些函数,并导入地图主题。 删除 get_tile_glyph、wall_glyph 和 is_revealed_and_wall。 在顶部,添加 use crate::map::tile_glyph 并更改两个渲染函数以使用它:
#![allow(unused)]
fn main() {
let (glyph, fg, bg) = tile_glyph(idx, &*map);
}
这有两个很好的效果:你的相机现在仅仅是一个相机,并且你能够更改每个关卡的主题!
构建森林主题
在 themes.rs 中,让我们扩展 tile_glyph 函数,以便为关卡 2 分支到单独的森林主题:
#![allow(unused)]
fn main() {
pub fn tile_glyph(idx: usize, map : &Map) -> (rltk::FontCharType, RGB, RGB) {
    match map.depth {
        2 => get_forest_glyph(idx, map),
        _ => get_tile_glyph_default(idx, map)
    }
}
}
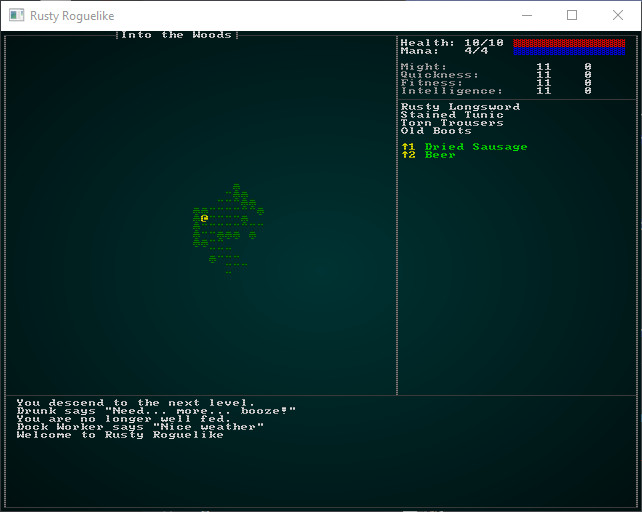
现在,当然,我们必须编写 get_forest_glyph:
#![allow(unused)]
fn main() {
fn get_forest_glyph(idx:usize, map: &Map) -> (rltk::FontCharType, RGB, RGB) {
    let glyph;
    let fg;
    let bg = RGB::from_f32(0., 0., 0.);

    match map.tiles[idx] {
        TileType::Wall => { glyph = rltk::to_cp437('♣'); fg = RGB::from_f32(0.0, 0.6, 0.0); }
        TileType::Bridge => { glyph = rltk::to_cp437('.'); fg = RGB::named(rltk::CHOCOLATE); }
        TileType::Road => { glyph = rltk::to_cp437('≡'); fg = RGB::named(rltk::YELLOW); }
        TileType::Grass => { glyph = rltk::to_cp437('"'); fg = RGB::named(rltk::GREEN); }
        TileType::ShallowWater => { glyph = rltk::to_cp437('~'); fg = RGB::named(rltk::CYAN); }
        TileType::DeepWater => { glyph = rltk::to_cp437('~'); fg = RGB::named(rltk::BLUE); }
        TileType::Gravel => { glyph = rltk::to_cp437(';'); fg = RGB::from_f32(0.5, 0.5, 0.5); }
        TileType::DownStairs => { glyph = rltk::to_cp437('>'); fg = RGB::from_f32(0., 1.0, 1.0); }
        _ => { glyph = rltk::to_cp437('"'); fg = RGB::from_f32(0.0, 0.6, 0.0); }
    }

    (glyph, fg, bg)
}
}
现在 cargo run,你会看到视觉上的变化产生了巨大的差异 - 它现在看起来像一个森林!
沿着黄砖路走
我们指定了一条道路穿过关卡,但我们没有为此构建器! 让我们制作一个并将其添加到构建器链中。 首先,我们将修改构建器链 - 摆脱 DistantExit 部分并添加一个新的 YellowBrickRoad 阶段:
#![allow(unused)]
fn main() {
pub fn forest_builder(new_depth: i32, _rng: &mut rltk::RandomNumberGenerator, width: i32, height: i32) -> BuilderChain {
    let mut chain = BuilderChain::new(new_depth, width, height, "Into the Woods");
    chain.start_with(CellularAutomataBuilder::new());
    chain.with(AreaStartingPosition::new(XStart::CENTER, YStart::CENTER));
    chain.with(CullUnreachable::new());
    chain.with(AreaStartingPosition::new(XStart::LEFT, YStart::CENTER));
    chain.with(VoronoiSpawning::new());
    chain.with(YellowBrickRoad::new());
    chain
}
}
然后我们将实现 YellowBrickRoad:
#![allow(unused)]
fn main() {
pub struct YellowBrickRoad {}

impl MetaMapBuilder for YellowBrickRoad {
    fn build_map(&mut self, rng: &mut rltk::RandomNumberGenerator, build_data : &mut BuilderMap)  {
        self.build(rng, build_data);
    }
}

impl YellowBrickRoad {
    #[allow(dead_code)]
    pub fn new() -> Box<YellowBrickRoad> {
        Box::new(YellowBrickRoad{})
    }

    fn find_exit(&self, build_data : &mut BuilderMap, seed_x : i32, seed_y: i32) -> (i32, i32) {
        let mut available_floors : Vec<(usize, f32)> = Vec::new();
        for (idx, tiletype) in build_data.map.tiles.iter().enumerate() {
            if map::tile_walkable(*tiletype) {
                available_floors.push(
                    (
                        idx,
                        rltk::DistanceAlg::PythagorasSquared.distance2d(
                            rltk::Point::new(idx as i32 % build_data.map.width, idx as i32 / build_data.map.width),
                            rltk::Point::new(seed_x, seed_y)
                        )
                    )
                );
            }
        }
        if available_floors.is_empty() {
            panic!("No valid floors to start on");
        }

        available_floors.sort_by(|a,b| a.1.partial_cmp(&b.1).unwrap());

        let end_x = available_floors[0].0 as i32 % build_data.map.width;
        let end_y = available_floors[0].0 as i32 / build_data.map.width;
        (end_x, end_y)
    }

    fn paint_road(&self, build_data : &mut BuilderMap, x: i32, y: i32) {
        if x < 1 || x > build_data.map.width-2 || y < 1 || y > build_data.map.height-2 {
            return;
        }
        let idx = build_data.map.xy_idx(x, y);
        if build_data.map.tiles[idx] != TileType::DownStairs {
            build_data.map.tiles[idx] = TileType::Road;
        }
    }

    fn build(&mut self, rng : &mut RandomNumberGenerator, build_data : &mut BuilderMap) {
        let starting_pos = build_data.starting_position.as_ref().unwrap().clone();
        let start_idx = build_data.map.xy_idx(starting_pos.x, starting_pos.y);

        let (end_x, end_y) = self.find_exit(build_data, build_data.map.width - 2, build_data.map.height / 2);
        let end_idx = build_data.map.xy_idx(end_x, end_y);
        build_data.map.tiles[end_idx] = TileType::DownStairs;

        build_data.map.populate_blocked();
        let path = rltk::a_star_search(start_idx, end_idx, &mut build_data.map);
        //if !path.success {
        //    panic!("No valid path for the road");
        //}
        for idx in path.steps.iter() {
            let x = *idx as i32 % build_data.map.width;
            let y = *idx as i32 / build_data.map.width;
            self.paint_road(build_data, x, y);
            self.paint_road(build_data, x-1, y);
            self.paint_road(build_data, x+1, y);
            self.paint_road(build_data, x, y-1);
            self.paint_road(build_data, x, y+1);
        }
        build_data.take_snapshot();
    }
}
}
这个构建器结合了我们已经实现的一些概念:
find_exit就像AreaStartingPoint构建器一样,但它会找到一个靠近提供的“种子”位置的区域并返回它。 我们将给它一个中东部的种子点,并将结果用作道路的目的地,因为我们从西部开始。paint_road检查瓷砖是否在地图边界内,如果它不是下楼梯 - 将其绘制为道路。build调用a_star_search以找到从西到东的有效路径。 然后,它沿着路径绘制一条 3x3 的道路。
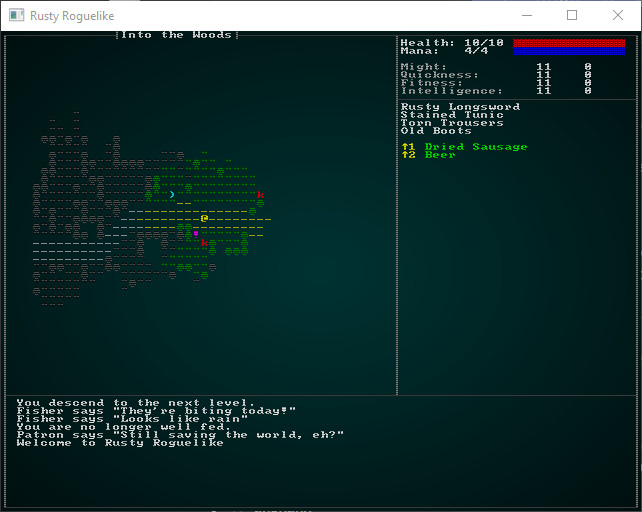
结果是一个森林,其中有一条通往东方的黄色道路。 当然,实际上还没有出口(而且你很可能被狗头人、地精和兽人谋杀!)
添加一个出口 - 和一些面包屑
现在我们将出口隐藏在地图的东北部 - 或东南部,我们将随机选择! 隐藏它提供了一种探索元素,但是不给用户关于位置的线索(尤其是在道路本质上是转移视线的情况下)是让你的玩家感到沮丧的好方法! 我们知道目的地是石灰岩洞穴,而石灰岩洞穴通常是由于水而形成的 - 因此有理由认为洞穴内/周围应该有水源。 我们将在地图上添加一条小溪! 将以下内容添加到你的 build 函数中:
#![allow(unused)]
fn main() {
// Place exit
// 放置出口
let exit_dir = rng.roll_dice(1, 2);
let (seed_x, seed_y, stream_startx, stream_starty) = if exit_dir == 1 {
    (build_data.map.width-1, 1, 0, build_data.height-1)
} else {
    (build_data.map.width-1, build_data.height-1, 1, build_data.height-1)
};

let (stairs_x, stairs_y) = self.find_exit(build_data, seed_x, seed_y);
let stairs_idx = build_data.map.xy_idx(stairs_x, stairs_y);
build_data.take_snapshot();

let (stream_x, stream_y) = self.find_exit(build_data, stream_startx, stream_starty);
let stream_idx = build_data.map.xy_idx(stream_x, stream_y) as usize;
let stream = rltk::a_star_search(stairs_idx, stream_idx, &mut build_data.map);
for tile in stream.steps.iter() {
    if build_data.map.tiles[*tile as usize] == TileType::Floor {
        build_data.map.tiles[*tile as usize] = TileType::ShallowWater;
    }
}
build_data.map.tiles[stairs_idx] = TileType::DownStairs;
build_data.take_snapshot();
}
这会随机选择一个出口位置(从东北和东南),然后在相反方向添加一条小溪。 再次,我们使用路径查找来放置小溪 - 这样我们就不会过多地干扰整体布局。 然后我们放置出口楼梯。
但是 - 我一直被兽人谋杀!
我们让默认生成发生,而没有考虑为我们的关卡更新怪物! 我们的玩家可能等级非常低,特别是考虑到我们直到下一章才会实现升级。 咳咳。 无论如何,我们应该引入一些对初学者友好的生成,并调整我们其他敌人的生成位置。 再次查看 spawns.json,我们将直接进入顶部的生成表。 我们将首先调整我们目前不想看到的物品的 min_depth 条目:
"spawn_table" : [
    { "name" : "Goblin", "weight" : 10, "min_depth" : 3, "max_depth" : 100 },
    { "name" : "Orc", "weight" : 1, "min_depth" : 3, "max_depth" : 100, "add_map_depth_to_weight" : true },
    { "name" : "Health Potion", "weight" : 7, "min_depth" : 0, "max_depth" : 100 },
    { "name" : "Fireball Scroll", "weight" : 2, "min_depth" : 0, "max_depth" : 100, "add_map_depth_to_weight" : true },
    { "name" : "Confusion Scroll", "weight" : 2, "min_depth" : 0, "max_depth" : 100, "add_map_depth_to_weight" : true },
    { "name" : "Magic Missile Scroll", "weight" : 4, "min_depth" : 0, "max_depth" : 100 },
    { "name" : "Dagger", "weight" : 3, "min_depth" : 0, "max_depth" : 100 },
    { "name" : "Shield", "weight" : 3, "min_depth" : 0, "max_depth" : 100 },
    { "name" : "Longsword", "weight" : 1, "min_depth" : 3, "max_depth" : 100 },
    { "name" : "Tower Shield", "weight" : 1, "min_depth" : 3, "max_depth" : 100 },
    { "name" : "Rations", "weight" : 10, "min_depth" : 0, "max_depth" : 100 },
    { "name" : "Magic Mapping Scroll", "weight" : 2, "min_depth" : 0, "max_depth" : 100 },
    { "name" : "Bear Trap", "weight" : 5, "min_depth" : 0, "max_depth" : 100 },
    { "name" : "Battleaxe", "weight" : 1, "min_depth" : 2, "max_depth" : 100 },
    { "name" : "Kobold", "weight" : 15, "min_depth" : 3, "max_depth" : 3 }
],
看看怪物在深度 3 之前是如何不出现的? 如果你现在 cargo run,你将拥有一个“Monty Haul”(这是一个关于获得免费物品的旧电视节目;它变成了 D&D 术语,意思是“太容易了,宝藏太多了”)的森林 - 到处都是免费物品,而且看不到任何风险。 我们希望玩家找到一些有用的物品,但我们也希望有一些风险! 如果你每次都只是赢,那就没什么游戏性了!
添加一些林地野兽
你期望在对初学者友好的树林中找到什么? 可能是老鼠、狼、狐狸、各种可食用但无害的野生动物(例如鹿)以及一些旅行者。 你甚至可能会遇到熊,但在这个级别会非常可怕! 我们已经有了老鼠,所以让我们只将它们添加到生成表中:
{ "name" : "Rat", "weight" : 15, "min_depth" : 2, "max_depth" : 3 }
我们可以通过复制/粘贴老鼠并稍作编辑来添加狼:
{
    "name" : "Mangy Wolf",
    "renderable": {
        "glyph" : "w",
        "fg" : "#FF0000",
        "bg" : "#000000",
        "order" : 1
    },
    "blocks_tile" : true,
    "vision_range" : 8,
    "ai" : "melee",
    "attributes" : {
        "Might" : 3,
        "Fitness" : 3
    },
    "skills" : {
        "Melee" : -1,
        "Defense" : -1
    },
    "natural" : {
        "armor_class" : 12,
        "attacks" : [
            { "name" : "bite", "hit_bonus" : 0, "damage" : "1d6" }
        ]
    }
},
我们希望它们比老鼠少见,所以也把它们放入生成表中 - 但权重较低:
{ "name" : "Mangy Wolf", "weight" : 13, "min_depth" : 2, "max_depth" : 3 }
我们也可以制作一只讨厌的狐狸。 同样,它在暗地里非常像老鼠!
{
    "name" : "Fox",
    "renderable": {
        "glyph" : "f",
        "fg" : "#FF0000",
        "bg" : "#000000",
        "order" : 1
    },
    "blocks_tile" : true,
    "vision_range" : 8,
    "ai" : "melee",
    "attributes" : {
        "Might" : 3,
        "Fitness" : 3
    },
    "skills" : {
        "Melee" : -1,
        "Defense" : -1
    },
    "natural" : {
        "armor_class" : 11,
        "attacks" : [
            { "name" : "bite", "hit_bonus" : 0, "damage" : "1d4" }
        ]
    }
},
也将狐狸添加到生成表中:
{ "name" : "Fox", "weight" : 15, "min_depth" : 2, "max_depth" : 3 }
仍然太难了 - 让我们给玩家更多生命值!
好的,所以我们仍然经常被谋杀。 让我们给可怜的玩家更多生命值! 打开 gamesystem.rs 并编辑 player_hp_at_level 以增加 10 点生命值:
#![allow(unused)]
fn main() {
pub fn player_hp_at_level(fitness:i32, level:i32) -> i32 {
    10 + (player_hp_per_level(fitness) * level)
}
}
在真正的游戏中,你会发现自己会大量调整这些东西,直到你获得正确的平衡感!
添加一些无害的野兽
并非典型森林中的所有事物都试图杀死你(除非你住在澳大利亚,我听说)。 让我们从制作一只鹿并给它 bystander AI 开始,这样它就不会伤害任何人:
{
    "name" : "Deer",
    "renderable": {
        "glyph" : "d",
        "fg" : "#FFFF00",
        "bg" : "#000000",
        "order" : 1
    },
    "blocks_tile" : true,
    "vision_range" : 8,
    "ai" : "bystander",
    "attributes" : {
        "Might" : 3,
        "Fitness" : 3
    },
    "skills" : {
        "Melee" : -1,
        "Defense" : -1
    },
    "natural" : {
        "armor_class" : 11,
        "attacks" : [
            { "name" : "bite", "hit_bonus" : 0, "damage" : "1d4" }
        ]
    }
},
并将其添加到生成表中:
{ "name" : "Deer", "weight" : 14, "min_depth" : 2, "max_depth" : 3 }
如果你现在 cargo run,你会在森林中遇到大量的生命 - 鹿会随机漫游,什么也不做。
但是鹿肉很好吃!
让鹿使用 bystander 系统的缺点是它们会愚蠢地漫游,而且你 - 和狼 - 都不能吃它们。 在更大的层面上,你也无法吃掉狼(并不是说它们会好吃)。 你也不能出售它们的皮毛,或者以其他方式从它们的屠杀中获利!
似乎这里实际上有三个问题:
- 当我们杀死东西时,它们应该(有时)掉落战利品供我们使用。
- 鹿需要它们自己的 AI。
- 狼需要想要吃鹿,这可能需要它们也有自己的 AI。
掉落战利品
一个好的开始是,当我们杀死一个实体时,它有机会掉落它携带的任何东西。 打开 damage_system.rs,我们将在 delete_the_dead 中添加一个阶段(在我们确定谁死了之后,在我们删除它们之前):
#![allow(unused)]
fn main() {
// Drop everything held by dead people
// 掉落死者持有的所有物品
{
    let mut to_drop : Vec<(Entity, Position)> = Vec::new();
    let entities = ecs.entities();
    let mut equipped = ecs.write_storage::<Equipped>();
    let mut carried = ecs.write_storage::<InBackpack>();
    let mut positions = ecs.write_storage::<Position>();
    for victim in dead.iter() {
        for (entity, equipped) in (&entities, &equipped).join() {
            if equipped.owner == *victim {
                // Drop their stuff
                // 掉落他们的物品
                let pos = positions.get(*victim);
                if let Some(pos) = pos {
                    to_drop.push((entity, pos.clone()));
                }
            }
        }
        for (entity, backpack) in (&entities, &carried).join() {
            if backpack.owner == *victim {
                // Drop their stuff
                // 掉落他们的物品
                let pos = positions.get(*victim);
                if let Some(pos) = pos {
                    to_drop.push((entity, pos.clone()));
                }
            }
        }
    }

    for drop in to_drop.iter() {
        equipped.remove(drop.0);
        carried.remove(drop.0);
        positions.insert(drop.0, drop.1.clone()).expect("Unable to insert position");
    }
}
}
因此,这段代码在 Equipped 和 InBackpack 组件存储中搜索死亡的实体,并将实体的位置和物品列在一个向量中。 然后它迭代该向量,删除该物品的任何 InBackpack 和 Equipped 标签 - 并添加地面上的位置。 这样做的最终结果是,当有人死亡时 - 他们的东西会掉到地板上。 这是一个好的开始,尽管装备精良的实体可能会留下很多东西。 我们稍后会担心这个问题。
因此,有了这段代码,你可以生成你希望实体掉落的所有物品,作为他们随身携带的东西。 从概念上讲,这有点奇怪(我想鹿确实会携带肉……) - 但它会起作用。 但是,我们可能不希望每只鹿都掉落相同的东西。 进入:战利品表!
战利品表
可以稍微控制一下哪些物品在哪里掉落是很好的。 游戏中有“狼掉落任何东西”(甚至盔甲!)和更现实的“狼掉落皮毛和肉”之间的区别。 战利品表让你自己做出这个决定。
我们将首先打开 spawns.json 并构建一个原型,了解我们希望战利品表结构的样子。 我们将尝试使其与生成表相似 - 这样我们就可以利用相同的 RandomTable 基础设施。 这是我想出的:
"loot_tables" : [
    { "name" : "Animal",
      "drops" : [
          { "name" : "Hide", "weight" : 10 },
          { "name" : "Meat", "weight" : 10 }
      ]
    }
],
这比生成表稍微复杂一些,因为我们想要有多个战利品表。 因此,分解它:
- 我们有一个外部容器
loot_tables- 它包含许多表。 - 表格有一个
name(用于标识它)和一组drops- 激活战利品表时可以“掉落”的物品。 drops中的每个条目都包含一个name(与物品列表中的物品匹配)和一个weight- 就像随机生成的权重一样。
所以真的,它是单个数组中的多个 - 命名的 - 表格。 现在我们必须读取它; 我们将打开 raws 目录并创建一个新文件:raws/loot_structs.rs。 这旨在匹配战利品表结构的内容:
#![allow(unused)]
fn main() {
use serde::{Deserialize};

#[derive(Deserialize, Debug)]
pub struct LootTable {
    pub name : String,
    pub drops : Vec<LootDrop>
}

#[derive(Deserialize, Debug)]
pub struct LootDrop {
    pub name : String,
    pub weight : i32
}
}
这与 JSON 版本几乎相同,只是采用 Rust 编写。 再次,我们描述了我们尝试读取的结构,并让序列化库 Serde 处理两者之间的转换。 然后我们打开 raws/mod.rs 并添加:
#![allow(unused)]
fn main() {
mod loot_structs;
use loot_structs::*;
}
在顶部,并扩展 Raws 结构以包含战利品表:
#![allow(unused)]
fn main() {
#[derive(Deserialize, Debug)]
pub struct Raws {
    pub items : Vec<Item>,
    pub mobs : Vec<Mob>,
    pub props : Vec<Prop>,
    pub spawn_table : Vec<SpawnTableEntry>,
    pub loot_tables : Vec<LootTable>
}
}
我们也需要将其添加到 rawmaster.rs 中的构造函数中:
#![allow(unused)]
fn main() {
impl RawMaster {
    pub fn empty() -> RawMaster {
        RawMaster {
            raws : Raws{
                items: Vec::new(),
                mobs: Vec::new(),
                props: Vec::new(),
                spawn_table: Vec::new(),
                loot_tables: Vec::new()
            },
            item_index : HashMap::new(),
            mob_index : HashMap::new(),
            prop_index : HashMap::new(),
        }
    }
    ...
}
这足以读取战利品表 - 但我们实际上需要使用它们! 我们将首先在 RawMaster 中添加另一个索引(在 raws/rawmaster.rs 中):
#![allow(unused)]
fn main() {
pub struct RawMaster {
    raws : Raws,
    item_index : HashMap<String, usize>,
    mob_index : HashMap<String, usize>,
    prop_index : HashMap<String, usize>,
    loot_index : HashMap<String, usize>
}
}
我们还必须将 loot_index : HashMap::new() 添加到 RawMaster::new 函数中,并在 load 函数中添加读取器:
#![allow(unused)]
fn main() {
for (i,loot) in self.raws.loot_tables.iter().enumerate() {
    self.loot_index.insert(loot.name.clone(), i);
}
}
接下来,我们需要为怪物提供拥有战利品表条目的选项。 因此,我们打开 mob_structs.rs 并将其添加到 Mob 结构中:
#![allow(unused)]
fn main() {
#[derive(Deserialize, Debug)]
pub struct Mob {
    pub name : String,
    pub renderable : Option<Renderable>,
    pub blocks_tile : bool,
    pub vision_range : i32,
    pub ai : String,
    pub quips : Option<Vec<String>>,
    pub attributes : MobAttributes,
    pub skills : Option<HashMap<String, i32>>,
    pub level : Option<i32>,
    pub hp : Option<i32>,
    pub mana : Option<i32>,
    pub equipped : Option<Vec<String>>,
    pub natural : Option<MobNatural>,
    pub loot_table : Option<String>
}
}
我们还需要添加一个新的组件,因此在 components.rs 中(并在 saveload_system.rs 和 main.rs 中注册):
#![allow(unused)]
fn main() {
#[derive(Component, Debug, Serialize, Deserialize, Clone)]
pub struct LootTable {
    pub table : String
}
}
然后我们将回到 rawmaster.rs 并查看 spawn_named_mob 函数。 如果怪物支持,我们需要添加附加 LootTable 组件的功能:
#![allow(unused)]
fn main() {
if let Some(loot) = &mob_template.loot_table {
    eb = eb.with(LootTable{table: loot.clone()});
}
}
我们提到了两个新项目,因此我们需要将它们添加到 spawns.json 的 items 部分中:
{
    "name" : "Meat",
    "renderable": {
        "glyph" : "%",
        "fg" : "#00FF00",
        "bg" : "#000000",
        "order" : 2
    },
    "consumable" : {
        "effects" : {
            "food" : ""
        }
    }
},

{
    "name" : "Hide",
    "renderable": {
        "glyph" : "ß",
        "fg" : "#A52A2A",
        "bg" : "#000000",
        "order" : 2
    }
},
你会注意到,在这一点上,皮革完全没用; 我们将在后面的章节中担心这个问题。 现在,让我们修改 mangy wolf 和 deer 以拥有战利品表。 就像添加一行一样简单:
"loot_table" : "Animal"
现在一切都已就绪 - 当生物死亡时,我们实际上需要生成一些战利品! 我们需要一种滚动战利品的方法,因此在 rawmaster.rs 中,我们引入了一个新函数:
#![allow(unused)]
fn main() {
pub fn get_item_drop(raws: &RawMaster, rng : &mut rltk::RandomNumberGenerator, table: &str) -> Option<String> {
    if raws.loot_index.contains_key(table) {
        let mut rt = RandomTable::new();
        let available_options = &raws.raws.loot_tables[raws.loot_index[table]];
        for item in available_options.drops.iter() {
            rt = rt.add(item.name.clone(), item.weight);
        }
        return Some(rt.roll(rng));
    }

    None
}
}
这非常简单:我们查看指定名称的表是否存在,如果不存在,则返回 None。 如果它确实存在,我们从原始文件信息中创建一个名称和权重的表 - 并滚动以确定随机加权的结果,然后我们返回该结果。 现在,我们将它附加到 damage_system.rs 中的 delete_the_dead:
#![allow(unused)]
fn main() {
// Drop everything held by dead people
// 掉落死者持有的所有物品
let mut to_spawn : Vec<(String, Position)> = Vec::new();
{ // To avoid keeping hold of borrowed entries, use a scope
  // 为了避免持有借用的条目,请使用作用域
    let mut to_drop : Vec<(Entity, Position)> = Vec::new();
    let entities = ecs.entities();
    let mut equipped = ecs.write_storage::<Equipped>();
    let mut carried = ecs.write_storage::<InBackpack>();
    let mut positions = ecs.write_storage::<Position>();
    let loot_tables = ecs.read_storage::<LootTable>();
    let mut rng = ecs.write_resource::<rltk::RandomNumberGenerator>();
    for victim in dead.iter() {
        let pos = positions.get(*victim);
        for (entity, equipped) in (&entities, &equipped).join() {
            if equipped.owner == *victim {
                // Drop their stuff
                // 掉落他们的物品
                if let Some(pos) = pos {
                    to_drop.push((entity, pos.clone()));
                }
            }
        }
        for (entity, backpack) in (&entities, &carried).join() {
            if backpack.owner == *victim {
                // Drop their stuff
                // 掉落他们的物品
                if let Some(pos) = pos {
                    to_drop.push((entity, pos.clone()));
                }
            }
        }

        if let Some(table) = loot_tables.get(*victim) {
            let drop_finder = crate::raws::get_item_drop(
                &crate::raws::RAWS.lock().unwrap(),
                &mut rng,
                &table.table
            );
            if let Some(tag) = drop_finder {
                if let Some(pos) = pos {
                    to_spawn.push((tag, pos.clone()));
                }
            }
        }
    }

    for drop in to_drop.iter() {
        equipped.remove(drop.0);
        carried.remove(drop.0);
        positions.insert(drop.0, drop.1.clone()).expect("Unable to insert position");
    }
}

{
    for drop in to_spawn.iter() {
        crate::raws::spawn_named_item(
            &crate::raws::RAWS.lock().unwrap(),
            ecs,
            &drop.0,
            crate::raws::SpawnType::AtPosition{x : drop.1.x, y: drop.1.y}
        );
    }
}
}
这有点混乱。 我们首先创建一个 to_spawn 向量,其中包含位置和名称。 然后,在我们完成将物品移出背包和装备后,我们查看是否有战利品表。 如果有,并且有一个位置 - 我们将两者都添加到 to_spawn 列表中。 完成后,我们迭代 to_spawn 列表,并为我们找到的每个结果调用 spawn_named_item。 像这样分散的原因是借用检查器:当我们在查看掉落物品时,我们保留对 entities 的持有,但是 spawn_named_item 希望临时(在其运行时)拥有世界! 因此,我们必须等到完成之后才能交出所有权。
如果你现在 cargo run,你可以杀死狼和鹿 - 它们会掉落肉和皮革。 这是一个很好的改进 - 你可以主动狩猎动物以确保你有东西吃!
一些强盗 - 他们会掉落物品!
让我们添加一些强盗,并给他们一些最少的装备。 这为玩家提供了一个在进入下一关之前掠夺一些更好装备的机会,以及森林中更多的多样性。 这是 NPC 定义:
{
    "name" : "Bandit",
    "renderable": {
        "glyph" : "☻",
        "fg" : "#FF0000",
        "bg" : "#000000",
        "order" : 1
    },
    "blocks_tile" : true,
    "vision_range" : 4,
    "ai" : "melee",
    "quips" : [ "Stand and deliver!", "Alright, hand it over" ],
    "attributes" : {},
    "equipped" : [ "Shortsword", "Shield", "Leather Armor", "Leather Boots" ]
},
像这样将它们添加到生成表中:
{ "name" : "Bandit", "weight" : 9, "min_depth" : 2, "max_depth" : 3 }
我们还必须定义短剑、皮甲和皮靴,因为它们是新的! 这现在应该是旧闻了:
{
    "name" : "Shortsword",
    "renderable": {
        "glyph" : "/",
        "fg" : "#FFAAFF",
        "bg" : "#000000",
        "order" : 2
    },
    "weapon" : {
        "range" : "melee",
        "attribute" : "Might",
        "base_damage" : "1d6",
        "hit_bonus" : 0
    }
},

{
    "name" : "Leather Armor",
    "renderable": {
        "glyph" : "[",
        "fg" : "#00FF00",
        "bg" : "#000000",
        "order" : 2
    },
    "wearable" : {
        "slot" : "Torso",
        "armor_class" : 1.0
    }
},

{
    "name" : "Leather Boots",
    "renderable": {
        "glyph" : "[",
        "fg" : "#00FF00",
        "bg" : "#000000",
        "order" : 2
    },
    "wearable" : {
        "slot" : "Feet",
        "armor_class" : 0.2
    }
}
如果你现在 cargo run,你就有望找到一个强盗 - 杀死他们会掉落他们的战利品!
受惊的鹿和饥饿的狼
我们在本章中做得相当不错! 我们有一个全新的关卡可以玩,新的怪物,新的物品,战利品表和 NPC 在死亡时掉落他们拥有的物品。 仍然有一件事困扰着我:你不能杀死鹿,狼也不能。 期望狼与小鹿斑比闲逛而不通过吃掉它来破坏电影真的不现实,而且鹿不会从玩家和狼那里逃跑也很令人惊讶。
打开 components.rs,我们将引入两个新组件:Carnivore 和 Herbivore(我们不会忘记在 main.rs 和 saveload_system.rs 中注册它们):
#![allow(unused)]
fn main() {
#[derive(Component, Debug, Serialize, Deserialize, Clone)]
pub struct Carnivore {}

#[derive(Component, Debug, Serialize, Deserialize, Clone)]
pub struct Herbivore {}
}
我们还将修改 raws/rawmaster.rs 中的 spawn_named_mob,以便让我们生成食肉动物和食草动物作为 AI 类:
#![allow(unused)]
fn main() {
match mob_template.ai.as_ref() {
    "melee" => eb = eb.with(Monster{}),
    "bystander" => eb = eb.with(Bystander{}),
    "vendor" => eb = eb.with(Vendor{}),
    "carnivore" => eb = eb.with(Carnivore{}),
    "herbivore" => eb = eb.with(Herbivore{}),
    _ => {}
}
}
现在我们将创建一个新的系统来处理它们的 AI,将其放入文件:animal_ai_system.rs:
#![allow(unused)]
fn main() {
use specs::prelude::*;
use super::{Viewshed, Herbivore, Carnivore, Item, Map, Position, WantsToMelee, RunState,
    Confusion, particle_system::ParticleBuilder, EntityMoved};
use rltk::{Point};

pub struct AnimalAI {}

impl<'a> System<'a> for AnimalAI {
    #[allow(clippy::type_complexity)]
    type SystemData = ( WriteExpect<'a, Map>,
                        ReadExpect<'a, Entity>,
                        ReadExpect<'a, RunState>,
                        Entities<'a>,
                        WriteStorage<'a, Viewshed>,
                        ReadStorage<'a, Herbivore>,
                        ReadStorage<'a, Carnivore>,
                        ReadStorage<'a, Item>,
                        WriteStorage<'a, WantsToMelee>,
                        WriteStorage<'a, EntityMoved>,
                        WriteStorage<'a, Position> );

    fn run(&mut self, data : Self::SystemData) {
        let (mut map, player_entity, runstate, entities, mut viewshed,
            herbivore, carnivore, item, mut wants_to_melee, mut entity_moved, mut position) = data;

        if *runstate != RunState::MonsterTurn { return; }

        // Herbivores run away a lot
        // 食草动物经常逃跑
        for (entity, mut viewshed, _herbivore, mut pos) in (&entities, &mut viewshed, &herbivore, &mut position).join() {
            let mut run_away_from : Vec<usize> = Vec::new();
            for other_tile in viewshed.visible_tiles.iter() {
                let view_idx = map.xy_idx(other_tile.x, other_tile.y);
                for other_entity in map.tile_content[view_idx].iter() {
                    // They don't run away from items
                    // 它们不会从物品中逃跑
                    if item.get(*other_entity).is_none() {
                        run_away_from.push(view_idx);
                    }
                }
            }

            if !run_away_from.is_empty() {
                let my_idx = map.xy_idx(pos.x, pos.y);
                map.populate_blocked();
                let flee_map = rltk::DijkstraMap::new(map.width as usize, map.height as usize, &run_away_from, &*map, 100.0);
                let flee_target = rltk::DijkstraMap::find_highest_exit(&flee_map, my_idx, &*map);
                if let Some(flee_target) = flee_target {
                    if !map.blocked[flee_target as usize] {
                        map.blocked[my_idx] = false;
                        map.blocked[flee_target as usize] = true;
                        viewshed.dirty = true;
                        pos.x = flee_target as i32 % map.width;
                        pos.y = flee_target as i32 / map.width;
                        entity_moved.insert(entity, EntityMoved{}).expect("Unable to insert marker");
                    }
                }
            }
        }

        // Carnivores just want to eat everything
        // 食肉动物只想吃掉一切
        for (entity, mut viewshed, _carnivore, mut pos) in (&entities, &mut viewshed, &carnivore, &mut position).join() {
            let mut run_towards : Vec<usize> = Vec::new();
            let mut attacked = false;
            for other_tile in viewshed.visible_tiles.iter() {
                let view_idx = map.xy_idx(other_tile.x, other_tile.y);
                for other_entity in map.tile_content[view_idx].iter() {
                    if herbivore.get(*other_entity).is_some() || *other_entity == *player_entity {
                        let distance = rltk::DistanceAlg::Pythagoras.distance2d(
                            Point::new(pos.x, pos.y),
                            *other_tile
                        );
                        if distance < 1.5 {
                            wants_to_melee.insert(entity, WantsToMelee{ target: *other_entity }).expect("Unable to insert attack");
                            attacked = true;
                        } else {
                            run_towards.push(view_idx);
                        }
                    }
                }
            }

            if !run_towards.is_empty() && !attacked {
                let my_idx = map.xy_idx(pos.x, pos.y);
                map.populate_blocked();
                let chase_map = rltk::DijkstraMap::new(map.width as usize, map.height as usize, &run_towards, &*map, 100.0);
                let chase_target = rltk::DijkstraMap::find_lowest_exit(&chase_map, my_idx, &*map);
                if let Some(chase_target) = chase_target {
                    if !map.blocked[chase_target as usize] {
                        map.blocked[my_idx] = false;
                        map.blocked[chase_target as usize] = true;
                        viewshed.dirty = true;
                        pos.x = chase_target as i32 % map.width;
                        pos.y = chase_target as i32 / map.width;
                        entity_moved.insert(entity, EntityMoved{}).expect("Unable to insert marker");
                    }
                }
            }
        }
    }
}
}
(我们还需要将其添加到 main.rs 中的 run_systems)。 我们已经制作了一些系统,因此我们将跳过其中的一些内容。 重要的部分是涵盖食草动物和食肉动物的循环。 它们基本上是相同的 - 但逻辑颠倒了。 让我们来看看食草动物:
- 我们循环遍历具有
Herbivore组件以及位置和视野的实体。 - 我们浏览食草动物的视野,查看它们可以看到的每个瓷砖。
- 我们迭代可见瓷砖的
tile_content,如果它不是物品(我们不需要鹿从口粮中逃跑!),我们将其添加到flee_from列表中。 - 我们使用
flee_from构建一个 Dijkstra 地图,并选择最高可能的出口:这意味着它们想要尽可能远离其他实体! - 如果它没有被阻挡,我们会移动它们。
这有一个很好的效果,鹿会发现你,并试图保持远离。 它们也会对地图上的其他人这样做。 如果你能抓住它们,你就可以杀死它们并吃掉它们 - 但它们会尽力逃脱。
食肉动物循环非常相似:
- 我们循环遍历具有
Carnivore组件以及位置和视野的实体。 - 我们浏览食肉动物的视野,查看它们可以看到的东西。
- 我们迭代
tile_content以查看那里有什么; 如果它是食草动物或玩家,它们会将其添加到run_towards列表中。 它们还会检查距离:如果它们相邻,它们会发起近战。 - 我们使用
run_towards构建 Dijkstra 地图,并使用find_lowest_exit向最接近的目标移动。
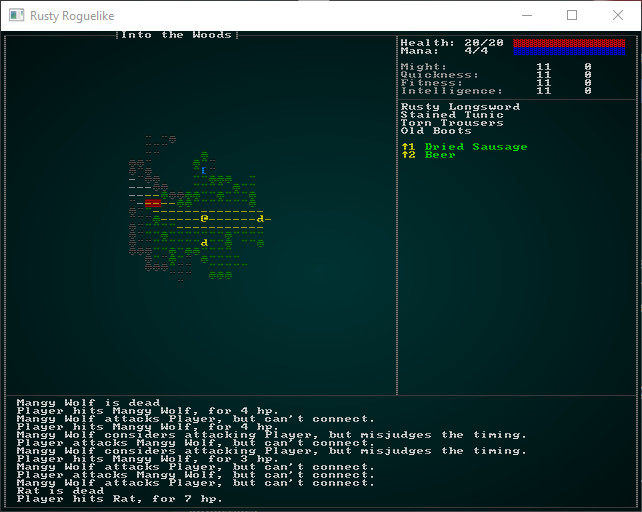
这使得地图生机勃勃:鹿在逃跑,狼在试图吃掉它们。 如果狼在追你,你也许可以用鹿来分散它的注意力并逃脱!
总结
这是一个很大的章节,但我们为游戏添加了一个完整的关卡! 它有一个地图、一个主题、战利品表、可掉落物品、新的 NPC/怪物、两个新的 AI 类别,并演示了 Dijkstra 地图如何制作出逼真但简单的 AI。 唷!
在下一章中,我们将改变齿轮,看看如何添加一些玩家进度。
本章的源代码可以在这里找到
在你的浏览器中使用 Web 程序集运行本章的示例(需要 WebGL2)
版权所有 (C) 2019, Herbert Wolverson。