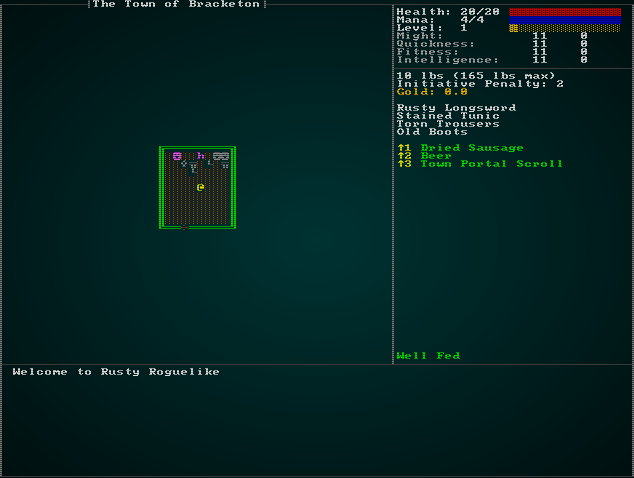
城镇传送门
关于本教程
本教程是免费且开源的,所有代码均使用 MIT 许可证 - 因此您可以随意使用它。我希望您会喜欢本教程,并制作出色的游戏!
如果您喜欢这个教程并希望我继续写作,请考虑支持我的 Patreon。
我们在设计文档中提到了城镇传送门,现在越来越明显它们会有多大帮助:长途跋涉回到城镇出售你辛苦赚来的战利品(并可能存钱升级来对抗那些小小的龙形杀手!)真的很累人。
城镇传送卷轴的基本思路很简单:你施放法术,一个传送门打开并将你送回城镇。你在城镇里做你的事情,然后返回传送门 - 它会把你传送回你原来的位置。取决于游戏,它可能会在你离开期间治愈该层级的怪物。通常,怪物不会跟随你穿过传送门(如果它们会,你可以用一个位置恰当的传送门摧毁城镇!)。
生成城镇传送卷轴
我们应该从在 spawns.json 中将它们定义为另一个物品开始:
{
    "name" : "Town Portal Scroll",
    "renderable": {
        "glyph" : ")",
        "fg" : "#AAAAFF",
        "bg" : "#000000",
        "order" : 2
    },
    "consumable" : {
        "effects" : {
            "town_portal" : ""
        }
    },
    "weight_lbs" : 0.5,
    "base_value" : 20.0,
    "vendor_category" : "alchemy"
},
我们还应该使它们在生成表中相当常见:
{ "name" : "Town Portal Scroll", "weight" : 4, "min_depth" : 0, "max_depth" : 100 },
这足以让它们进入游戏:它们作为掉落物生成,并且可以从城镇的炼金术士处购买(诚然,当您需要它们时,这并没有什么帮助,但是通过一些计划,它可以提供帮助!)。
实现城镇传送门
下一个阶段是让城镇传送门做一些事情。我们已经添加了一个 "effects" 标签,使其在使用时被消耗并查找该标签。其他效果使用组件来指示发生的事情;所以我们将打开 components.rs 并创建一个新的组件类型(并在 main.rs 和 saveload_system.rs 中注册):
#![allow(unused)]
fn main() {
#[derive(Component, Debug, Serialize, Deserialize, Clone)]
pub struct TownPortal {}
}
我们还需要打开 rawmaster.rs,并编辑 spawn_named_item 以添加标签:
#![allow(unused)]
fn main() {
if let Some(consumable) = &item_template.consumable {
    eb = eb.with(crate::components::Consumable{});
    for effect in consumable.effects.iter() {
        let effect_name = effect.0.as_str();
        match effect_name {
            "provides_healing" => {
                eb = eb.with(ProvidesHealing{ heal_amount: effect.1.parse::<i32>().unwrap() })
            }
            "ranged" => { eb = eb.with(Ranged{ range: effect.1.parse::<i32>().unwrap() }) },
            "damage" => { eb = eb.with(InflictsDamage{ damage : effect.1.parse::<i32>().unwrap() }) }
            "area_of_effect" => { eb = eb.with(AreaOfEffect{ radius: effect.1.parse::<i32>().unwrap() }) }
            "confusion" => { eb = eb.with(Confusion{ turns: effect.1.parse::<i32>().unwrap() }) }
            "magic_mapping" => { eb = eb.with(MagicMapper{}) }
            "town_portal" => { eb = eb.with(TownPortal{}) }
            "food" => { eb = eb.with(ProvidesFood{}) }
            _ => {
                rltk::console::log(format!("Warning: consumable effect {} not implemented.", effect_name));
            }
        }
    }
}
}
到目前为止,我们所有的层级转换都是通过 main.rs 中的 RunState 完成的。所以在 main.rs 中,我们将添加一个新的状态:
#![allow(unused)]
fn main() {
#[derive(PartialEq, Copy, Clone)]
pub enum RunState {
    AwaitingInput,
    PreRun,
    Ticking,
    ShowInventory,
    ShowDropItem,
    ShowTargeting { range : i32, item : Entity},
    MainMenu { menu_selection : gui::MainMenuSelection },
    SaveGame,
    NextLevel,
    PreviousLevel,
    TownPortal,
    ShowRemoveItem,
    GameOver,
    MagicMapReveal { row : i32 },
    MapGeneration,
    ShowCheatMenu,
    ShowVendor { vendor: Entity, mode : VendorMode }
}
}
这样就标记了效果。现在我们需要让它发挥作用!打开 inventory_system.rs,我们想要编辑 ItemUseSystem。在魔法地图之后,以下代码只是记录一个事件,消耗物品并更改游戏状态:
#![allow(unused)]
fn main() {
// 如果是城镇传送门...
if let Some(_townportal) = town_portal.get(useitem.item) {
    if map.depth == 1 {
        gamelog.entries.push("You are already in town, so the scroll does nothing.".to_string());
    } else {
        used_item = true;
        gamelog.entries.push("You are telported back to town!".to_string());
        *runstate = RunState::TownPortal;
    }
}
}
接下来是在 main.rs 中处理状态:
#![allow(unused)]
fn main() {
RunState::TownPortal => {
    // 生成传送门
    spawner::spawn_town_portal(&mut self.ecs);

    // 转换
    let map_depth = self.ecs.fetch::<Map>().depth;
    let destination_offset = 0 - (map_depth-1);
    self.goto_level(destination_offset);
    self.mapgen_next_state = Some(RunState::PreRun);
    newrunstate = RunState::MapGeneration;
}
}
这相对简单:它调用尚未编写的 spawn_town_portal 函数,检索深度,并使用与 NextLevel 和 PreviousLevel 相同的逻辑切换到城镇层级(计算偏移量以产生深度为 1)。
我们还需要修改 Ticking 处理程序,以允许 TownPortal 从循环中退出:
#![allow(unused)]
fn main() {
RunState::Ticking => {
    while newrunstate == RunState::Ticking {
        self.run_systems();
        self.ecs.maintain();
        match *self.ecs.fetch::<RunState>() {
            RunState::AwaitingInput => newrunstate = RunState::AwaitingInput,
            RunState::MagicMapReveal{ .. } => newrunstate = RunState::MagicMapReveal{ row: 0 },
            RunState::TownPortal => newrunstate = RunState::TownPortal,
            _ => newrunstate = RunState::Ticking
        }
    }
}
}
兔子洞自然而然地将我们引向 spawner.rs,以及 spawn_town_portal 函数。让我们编写它:
#![allow(unused)]
fn main() {
pub fn spawn_town_portal(ecs: &mut World) {
    // 获取当前位置和深度
    let map = ecs.fetch::<Map>();
    let player_depth = map.depth;
    let player_pos = ecs.fetch::<rltk::Point>();
    let player_x = player_pos.x;
    let player_y = player_pos.y;
    std::mem::drop(player_pos);
    std::mem::drop(map);

    // 找到城镇中传送门的位置
    let dm = ecs.fetch::<MasterDungeonMap>();
    let town_map = dm.get_map(1).unwrap();
    let mut stairs_idx = 0;
    for (idx, tt) in town_map.tiles.iter().enumerate() {
        if *tt == TileType::DownStairs {
            stairs_idx = idx;
        }
    }
    let portal_x = (stairs_idx as i32 % town_map.width)-2;
    let portal_y = stairs_idx as i32 / town_map.width;

    std::mem::drop(dm);

    // 生成传送门本身
    ecs.create_entity()
        .with(OtherLevelPosition { x: portal_x, y: portal_y, depth: 1 })
        .with(Renderable {
            glyph: rltk::to_cp437('♥'),
            fg: RGB::named(rltk::CYAN),
            bg: RGB::named(rltk::BLACK),
            render_order: 0
        })
        .with(EntryTrigger{})
        .with(TeleportTo{ x: player_x, y: player_y, depth: player_depth, player_only: true })
        .with(Name{ name : "Town Portal".to_string() })
        .with(SingleActivation{})
        .build();
}
}
这是一个繁忙的函数,因此我们将逐步介绍它:
- 我们检索玩家的深度和位置,然后释放对资源的访问(以防止借用继续)。
- 我们在
MasterDungeonMap中查找城镇地图,并找到生成点。我们将传送门向西移动两个图块,并将它存储为portal_x和portal_y。然后我们再次释放对地下城地图的访问,以避免保持借用。 - 我们为传送门创建一个实体。我们给它一个
OtherLevelPosition,表明它在城镇中 - 在我们计算的坐标处。我们给它一个Renderable(青色的心形),一个Name(以便它显示在工具提示中)。我们还给它一个EntryTrigger- 所以进入它将触发一个效果。最后,我们给它一个TeleportTo组件;我们还没有编写它,但是您可以看到我们正在指定目的地坐标(回到玩家开始的地方)。还有一个player_only设置 - 如果传送器对每个人都有效,城镇醉汉可能会错误地走进传送门,导致(可笑的)情况,他们被传送到地下城并可怕地死去。为了避免这种情况,我们将使这个传送器仅对玩家有效!
既然我们已经使用了它,我们最好在 components.rs 中创建 TeleportTo(并在 main.rs 和 saveload_system.rs 中注册)。它非常简单:
#![allow(unused)]
fn main() {
#[derive(Component, Debug, Serialize, Deserialize, Clone)]
pub struct TeleportTo {
    pub x: i32,
    pub y: i32,
    pub depth: i32,
    pub player_only : bool
}
}
我们将稍后担心如何使传送器工作。
为了帮助测试系统,我们将让玩家以城镇传送卷轴开始。在 spawner.rs 中,我们将修改 player:
#![allow(unused)]
fn main() {
spawn_named_entity(&RAWS.lock().unwrap(), ecs, "Town Portal Scroll", SpawnType::Carried{by : player});
}
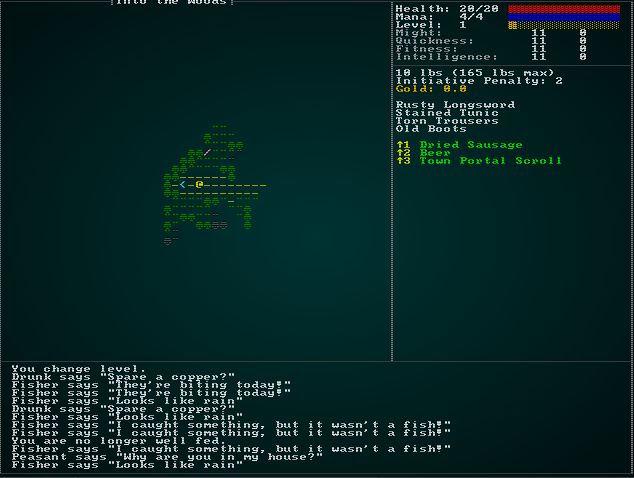
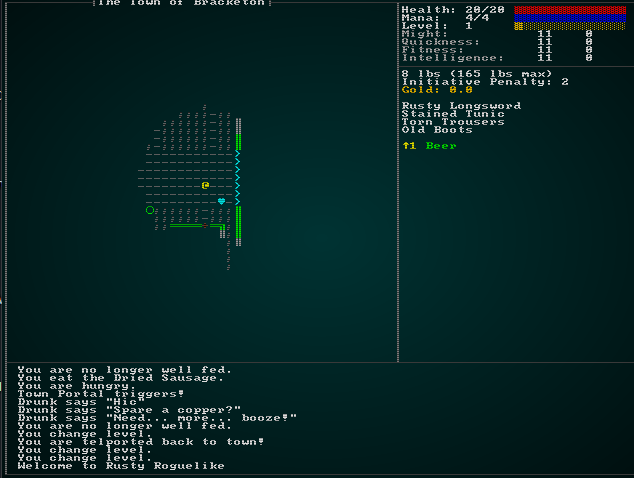
如果您现在 cargo run,您将以一个 Town Portal Scroll 开始。尝试在城镇中使用它会给您“没有效果”的消息。前往另一个层级,然后使用它会将您传送回城镇,并出现一个传送门 - 正是我们想要的(但还没有返回的方式):
实现传送器
现在我们需要使传送门返回你在地下城中的起始点。由于我们已经实现了可以拥有 TeleportTo 的触发器,因此值得花时间使传送触发器更通用(例如,您可以拥有传送陷阱 - 或房间之间的传送器,甚至通往最终层级的传送门)。实际上这里有很多需要考虑的:
- 除非您将其标记为“仅限玩家”,否则传送器会影响任何进入图块的人。
- 传送可能发生在当前层级中,在这种情况下,它就像常规移动。
- 传送也可能跨层级发生,在这种情况下,有两种可能性:
- 玩家正在传送,我们需要像其他层级转换一样调整游戏状态。
- 另一个实体正在传送,在这种情况下,我们需要删除其
Position组件并添加一个OtherLevelPosition组件,以便当玩家到达那里时,它们就位。
总体上清理移动
我们看到越来越多的地方实现了相同的基本移动代码:清除阻塞,移动,恢复阻塞。您可以在各处找到它,并且添加传送只会使其更加复杂(随着我们制作更大的游戏,其他系统也会如此)。这使得忘记更新某些内容变得太容易,并且还会使许多系统与可变的 position 和 map 访问混淆 - 而移动是他们需要写入访问的唯一原因。
对于大多数其他操作,我们都使用了基于意图的组件 - 移动也不应例外。打开 components.rs,我们将创建一些新组件(并在 main.rs 和 saveload_system.rs 中注册它们):
#![allow(unused)]
fn main() {
#[derive(Component, Debug, Serialize, Deserialize, Clone)]
pub struct ApplyMove {
    pub dest_idx : usize
}

#[derive(Component, Debug, Serialize, Deserialize, Clone)]
pub struct ApplyTeleport {
    pub dest_x : i32,
    pub dest_y : i32,
    pub dest_depth : i32
}
}
为了处理这些,让我们创建一个新的系统文件 - movement_system.rs:
#![allow(unused)]
fn main() {
use specs::prelude::*;
use super::{Map, Position, BlocksTile, ApplyMove, ApplyTeleport, OtherLevelPosition, EntityMoved,
    Viewshed};

pub struct MovementSystem {}

impl<'a> System<'a> for MovementSystem {
    #[allow(clippy::type_complexity)]
    type SystemData = ( WriteExpect<'a, Map>,
                        WriteStorage<'a, Position>,
                        ReadStorage<'a, BlocksTile>,
                        Entities<'a>,
                        WriteStorage<'a, ApplyMove>,
                        WriteStorage<'a, ApplyTeleport>,
                        WriteStorage<'a, OtherLevelPosition>,
                        WriteStorage<'a, EntityMoved>,
                        WriteStorage<'a, Viewshed>,
                        ReadExpect<'a, Entity>);

    fn run(&mut self, data : Self::SystemData) {
        let (mut map, mut position, blockers, entities, mut apply_move,
            mut apply_teleport, mut other_level, mut moved,
            mut viewsheds, player_entity) = data;

        // 应用传送
        for (entity, teleport) in (&entities, &apply_teleport).join() {
            if teleport.dest_depth == map.depth {
                apply_move.insert(entity, ApplyMove{ dest_idx: map.xy_idx(teleport.dest_x, teleport.dest_y) })
                    .expect("Unable to insert");
            } else if entity == *player_entity {
                // 这是玩家 - 我们遇到了麻烦
                rltk::console::log(format!("Not implemented yet."));
            } else if let Some(pos) = position.get(entity) {
                let idx = map.xy_idx(pos.x, pos.y);
                let dest_idx = map.xy_idx(teleport.dest_x, teleport.dest_y);
                crate::spatial::move_entity(entity, idx, dest_idx);
                other_level.insert(entity, OtherLevelPosition{
                    x: teleport.dest_x,
                    y: teleport.dest_y,
                    depth: teleport.dest_depth })
                    .expect("Unable to insert");
                position.remove(entity);
            }
        }
        apply_teleport.clear();

        // 应用广泛的移动
        for (entity, movement, mut pos) in (&entities, &apply_move, &mut position).join() {
            let start_idx = map.xy_idx(pos.x, pos.y);
            let dest_idx = movement.dest_idx as usize;
            crate::spatial::move_entity(entity, start_idx, dest_idx);
            pos.x = movement.dest_idx as i32 % map.width;
            pos.y = movement.dest_idx as i32 / map.width;
            if let Some(vs) = viewsheds.get_mut(entity) {
                vs.dirty = true;
            }
            moved.insert(entity, EntityMoved{}).expect("Unable to insert");
        }
        apply_move.clear();
    }
}
}
这是一个内容丰富的系统,但您应该非常熟悉它 - 它没有做太多我们以前没有做过的事情,它只是将其集中在一个地方。让我们逐步了解它:
- 我们迭代所有标记为传送的实体。
- 如果是在当前深度上的传送,我们添加一个
apply_move组件来指示我们正在跨地图移动。 - 如果不是本地传送:
- 如果是玩家,我们暂时放弃(代码在本章稍后部分)。
- 如果不是玩家,我们删除他们的
Position组件并添加一个OtherLevelPosition组件,以将实体移动到传送目的地。
- 如果是在当前深度上的传送,我们添加一个
- 我们删除所有传送意图,因为我们已经处理了它们。
- 我们迭代所有带有
ApplyMove组件的实体。- 我们获取移动的起始和目标索引。
- 如果实体阻塞了图块,我们清除源图块中的阻塞,并在目标图块中设置阻塞状态。
- 我们将实体移动到目的地。
- 如果实体具有视野,我们将其标记为脏。
- 我们应用一个
EntityMoved组件。
您会注意到,这几乎与我们在其他系统中一直在做的事情完全相同 - 但它更具条件性:没有视野的实体可以移动,不阻塞图块的实体不会阻塞图块。
然后我们可以更新 ai/approach_system.rs,ai/chase_ai_system.rs,ai/default_move_system.rs 和 ai/flee_ai_system.rs,使其不再计算移动,而是为他们正在考虑的实体设置一个 ApplyMove 组件。这大大简化了系统,减少了大量的写入访问和几个完整的组件访问!系统没有改变它们的逻辑 - 只是它们的功能。与其在这里复制/粘贴所有内容,不如查看源代码 - 否则这将是创纪录长度的一章!
最后,我们需要将移动添加到 main.rs 中的 run_systems 中。在 defaultmove 之后和 triggers 之前添加它:
#![allow(unused)]
fn main() {
defaultmove.run_now(&self.ecs);
let mut moving = movement_system::MovementSystem{};
moving.run_now(&self.ecs);
let mut triggers = trigger_system::TriggerSystem{};
}
完成这些更改后,您可以 cargo run - 并看到事物的行为与以前相同。
使玩家传送工作
当玩家进入传送器时,我们不应该只是打印“尚未支持!”,而应该真正地传送他们!之所以在 movement_system.rs 中对此进行了特殊处理,是因为我们始终在主循环中处理层级转换(因为它们涉及到大量游戏状态)。因此,为了使此功能起作用,我们需要 main.rs 中的另一个状态:
#![allow(unused)]
fn main() {
#[derive(PartialEq, Copy, Clone)]
pub enum RunState {
    AwaitingInput,
    PreRun,
    Ticking,
    ShowInventory,
    ShowDropItem,
    ShowTargeting { range : i32, item : Entity},
    MainMenu { menu_selection : gui::MainMenuSelection },
    SaveGame,
    NextLevel,
    PreviousLevel,
    TownPortal,
    ShowRemoveItem,
    GameOver,
    MagicMapReveal { row : i32 },
    MapGeneration,
    ShowCheatMenu,
    ShowVendor { vendor: Entity, mode : VendorMode },
    TeleportingToOtherLevel { x: i32, y: i32, depth: i32 }
}
}
现在我们可以打开 movement_system.rs 并进行一些简单的更改,以使系统发出 RunState 更改:
#![allow(unused)]
fn main() {
impl<'a> System<'a> for MovementSystem {
    #[allow(clippy::type_complexity)]
    type SystemData = ( WriteExpect<'a, Map>,
                        WriteStorage<'a, Position>,
                        ReadStorage<'a, BlocksTile>,
                        Entities<'a>,
                        WriteStorage<'a, ApplyMove>,
                        WriteStorage<'a, ApplyTeleport>,
                        WriteStorage<'a, OtherLevelPosition>,
                        WriteStorage<'a, EntityMoved>,
                        WriteStorage<'a, Viewshed>,
                        ReadExpect<'a, Entity>,
                        WriteExpect<'a, RunState>);

    fn run(&mut self, data : Self::SystemData) {
        let (mut map, mut position, blockers, entities, mut apply_move,
            mut apply_teleport, mut other_level, mut moved,
            mut viewsheds, player_entity, mut runstate) = data;

        // 应用传送
        for (entity, teleport) in (&entities, &apply_teleport).join() {
            if teleport.dest_depth == map.depth {
                apply_move.insert(entity, ApplyMove{ dest_idx: map.xy_idx(teleport.dest_x, teleport.dest_y) })
                    .expect("Unable to insert");
            } else if entity == *player_entity {
                *runstate = RunState::TeleportingToOtherLevel{ x: teleport.dest_x, y: teleport.dest_y, depth: teleport.dest_depth };
                ...
}
在 main.rs 中,让我们修改 Ticking 状态,使其也接受 TeleportingToOtherLevel 作为退出条件:
#![allow(unused)]
fn main() {
RunState::Ticking => {
    while newrunstate == RunState::Ticking {
        self.run_systems();
        self.ecs.maintain();
        match *self.ecs.fetch::<RunState>() {
            RunState::AwaitingInput => newrunstate = RunState::AwaitingInput,
            RunState::MagicMapReveal{ .. } => newrunstate = RunState::MagicMapReveal{ row: 0 },
            RunState::TownPortal => newrunstate = RunState::TownPortal,
            RunState::TeleportingToOtherLevel{ x, y, depth } => newrunstate = RunState::TeleportingToOtherLevel{ x, y, depth },
            _ => newrunstate = RunState::Ticking
        }
    }
}
}
现在在 trigger_system.rs 中,我们需要进行一些更改,以便在触发时实际调用传送:
#![allow(unused)]
fn main() {
impl<'a> System<'a> for TriggerSystem {
    #[allow(clippy::type_complexity)]
    type SystemData = ( ReadExpect<'a, Map>,
                        WriteStorage<'a, EntityMoved>,
                        ReadStorage<'a, Position>,
                        ReadStorage<'a, EntryTrigger>,
                        WriteStorage<'a, Hidden>,
                        ReadStorage<'a, Name>,
                        Entities<'a>,
                        WriteExpect<'a, GameLog>,
                        ReadStorage<'a, InflictsDamage>,
                        WriteExpect<'a, ParticleBuilder>,
                        WriteStorage<'a, SufferDamage>,
                        ReadStorage<'a, SingleActivation>,
                        ReadStorage<'a, TeleportTo>,
                        WriteStorage<'a, ApplyTeleport>,
                        ReadExpect<'a, Entity>);

    fn run(&mut self, data : Self::SystemData) {
        let (map, mut entity_moved, position, entry_trigger, mut hidden,
            names, entities, mut log, inflicts_damage, mut particle_builder,
            mut inflict_damage, single_activation, teleporters,
            mut apply_teleport, player_entity) = data;

        ...

        // 如果是传送器,则执行传送
        if let Some(teleport) = teleporters.get(*entity_id) {
            if (teleport.player_only && entity == *player_entity) || !teleport.player_only {
                apply_teleport.insert(entity, ApplyTeleport{
                    dest_x : teleport.x,
                    dest_y : teleport.y,
                    dest_depth : teleport.depth
                }).expect("Unable to insert");
            }
        }
}
完成上述操作后,我们需要完成 main.rs 并将 TeleportingToOtherLevel 添加到主循环中:
#![allow(unused)]
fn main() {
RunState::TeleportingToOtherLevel{x, y, depth} => {
    self.goto_level(depth-1);
    let player_entity = self.ecs.fetch::<Entity>();
    if let Some(pos) = self.ecs.write_storage::<Position>().get_mut(*player_entity) {
        pos.x = x;
        pos.y = y;
    }
    let mut ppos = self.ecs.fetch_mut::<rltk::Point>();
    ppos.x = x;
    ppos.y = y;
    self.mapgen_next_state = Some(RunState::PreRun);
    newrunstate = RunState::MapGeneration;
}
}
因此,这会将玩家发送到指定的层级,更新他们的 Position 组件,并更新存储的玩家位置(覆盖楼梯查找)。
如果您现在 cargo run,您将拥有一个可用的城镇传送门!
幽默的旁白
让我们看看当我们从城镇传送门中删除 player_only 和 SingleActivation 安全措施时会发生什么。在 spawner.rs 中:
#![allow(unused)]
fn main() {
ecs.create_entity()
    .with(OtherLevelPosition { x: portal_x, y: portal_y, depth: 1 })
    .with(Renderable {
        glyph: rltk::to_cp437('♥'),
        fg: RGB::named(rltk::CYAN),
        bg: RGB::named(rltk::BLACK),
        render_order: 0
    })
    .with(EntryTrigger{})
    .with(TeleportTo{ x: player_x, y: player_y, depth: player_depth, player_only: false })
    // .with(SingleActivation{})
    .with(Name{ name : "Town Portal".to_string() })
    .build();
}
现在 cargo run,找到一个危险的地方,然后城镇传送门回家。在那里闲逛一会儿,直到一些无辜的镇民掉入传送门。然后跟随传送门返回,惊慌失措的镇民遭受了可怕的死亡!
我包含这个作为说明,说明了我们为什么要加入安全措施!
确保在您完成观看发生的事情后删除这些注释标签!
总结
在本章中,我们开始创建城镇传送门 - 并最终得到了一个通用的传送系统和一个清理后的移动系统。这为玩家提供了更多的战术选择,并启用了“抓取战利品,返回并出售”的游戏机制(如 Diablo 中所见)。我们越来越接近设计文档中描述的游戏了!
...
本章的源代码可以在这里找到
使用 web assembly 在您的浏览器中运行本章的示例(需要 WebGL2)
版权所有 (C) 2019, Herbert Wolverson.